Wednesday, April 25, 2012

Chewy Blondies


Preheat oven to 350 degrees F
13-by 9-inch baking pan, lightly greased

Ingredients:
3/4 cup brown rice flour
1/2 cup garbanzo bean flour
1/4 cup tapioca starch
2 tsp baking powder
2 tsp xanthan gum
1/4 tsp salt
1/2 tsp butter, softened
3/4 cup granulated sugar
1/3 cup packed brown sugar
2 eggs
1 tsp vanilla extract
1 cup white chocolate chips

Directions:
  1. In a large bowl mix together brown rice flour, garbanzo bean flour, tapioca starch, baking powder, xanthan gum and salt. Set aside.
  2. In a separate bowl, using an electric mixer, cream butter, granulated sugar and brown sugar. Add eggs and vanilla extract. Beat until light and fluffy. Gradually beat in dry ingredients, mixing just until smooth. Stir in white chocolate chips. Spoon into prepared pan, spread to edges and smooth top with a rubber spatula. Let stand for 30 minutes.
  3. Bake in preheated oven for 35-45 minutes or until wooden skewer inserted in the center comes out clean. Transfer to cooling rack and let cool completely. Cut into bars.

Saturday, April 14, 2012

Strawberries and Cream Shake

This shake tastes like a lighter version of a fast-food shake, only it's packed with protein - nearly half your needs for the day - and is very low in fat.

Serves 1

Ingredients:
1 1/2 cups fresh or frozen strawberries
1 8 ounce container plain 2% yogurt
1/4 cup skim milk or gluten-free vanilla soy milk
2 tbsp granulated sugar
1 tsp vanilla extract
4 ice cubes

Directions:
Place all the ingredients in a blender and blend on high speed until smooth. Serve immediately.
Nutrition stats (3 cups): 368 calories, 23 g protein, 57 g carbohydrates, 5 g fat (3 g saturated), 15 mg cholesterol, 4 g fiber, 90 mg sodium.

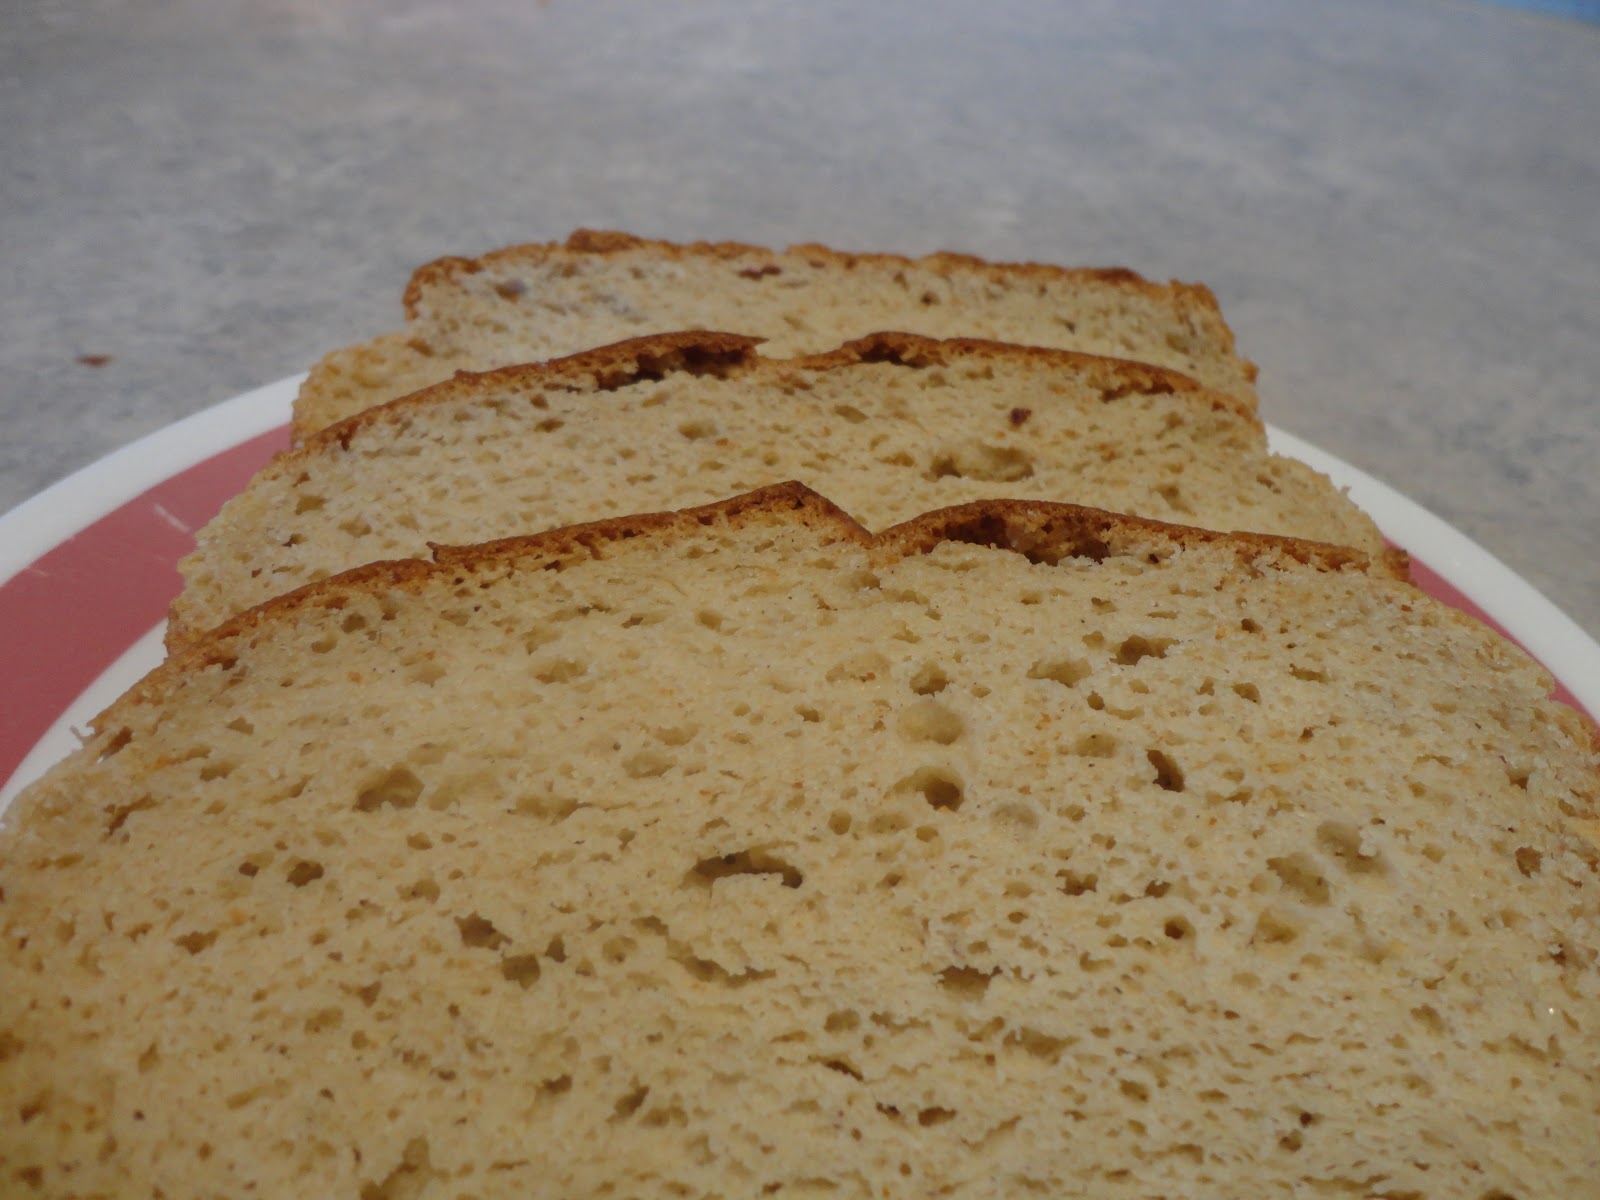
Brown Bread

Makes 1 loaf
9- by 5- inch (2L) loaf pan, lightly greased

Ingredients:

1 1/4 cups brown rice flour
1/2 cup sorghum flour
1/2 cup cornstarch
1/2 cup rice bran
1 tbsp xanthan gum
1 tbsp bread machine or instant yeast
1 1/4 tsp salt
1 cup water
1 tsp cider vinegar
2 tbsp vegetable oil
2 tbsp liquid honey
2 tbsp packed brown sugar
3 eggs

Directions:
  1. In a large bowl or plastic bag, combine brown rice flour, sorghum flour, cornstarch, rice bran, xanthan gum, yeast, and salt. Mix well and set aside.
  2. In a separate bowl, using a heavy-duty electirc mixer with paddle attachment, combine water, vinegar, oil, honey, brown sugar, and eggs until well blended.
  3. With the mixer on lowest speed, slowly add the dry ingredients to the honey mixture until combined. With a rubber spatula, scrape the bottom and sides of the bowl. With the mixer on medium speed, beat for 4 minutes.
  4. Spoon into prepared pan. Let rise, uncovered, in a warm, draft-free place for 60-75 minutes or until the dough has risen to the top of the pan. Meanwhile, preheat oven to 350 degrees F. Bake for 35 to 45 minutes or until the loaf sounds hollow when tapped on the bottom or stick a fork in it and if it comes out clean it is done.

Variations: For a more flavored bread, substitute 2 tbsp fancy molasses for the brown sugar.
            The rice bran can be replace by an equal amount of brown or white rice flour.


Monday, April 9, 2012

Yellow Birthday Cake

Makes 2 9-inch round cakes

Ingredients:
Nonstick cooking spray (for cake pans)
1 cup brown rice flour
1/2 cup coconut flour
1/2 cup tapioca starch
1 tbsp baking powder
1 tsp xanthan gum
1/4 tsp salt
1 1/2 cup granulated sugar
1 cup 2% milk
1/2 cup canola oil
2 eggs, lightly beaten
2 tsp vanilla extract

Directions:
  1. Preheat oven to 350 degrees F. Coat a two 9-inch cake pans with cooking spray.
  2. Place the brown rice flour, coconut flour, tapioca starch, baking powder, xanthan gum, and salt in a large bowl, and whisk to combine. Make a well in the center of the flour. Add the sugar, milk, canola oil, eggs, and vanilla extract. Using an electric mixer, beat on low speed for about 1 minute until the batter is very smooth. Divide teh batter between the prepared cake pans.
  3. Bake for 20 to 25 minutes, until the cakes spring back when the tops are pressed or until a toothpick tester comes out clean. Remove the cakes from their forms and let the cool completley on a wire rack.
  4. Once the cakes are cool, use a small spatula or a butter knife to ice them with your favorite icing. Store in an airtight container in the refigerator for up to 5 days.

Fudgy Brownies

This recipe was bit of an experiment. I used a cookbook but I didn't have some of the ingredients it called for so I substituted some things hoping it would still turn out and well they were so amazingingly fudgy and chocolatey!! So you have to try it!!

Makes 16 brownies
Preheat oven to 350 degrees F
8-inch (2L) square pan, lightly greased

Ingredients:
1/3 cup Garbanzo Flour
2 tbsp potato starch
1 cup packed brown sugar
1/2 tsp baking powder
1/2 tsp xanthan gum
1/8 tsp salt
1/2 cup unsalted butter
1/3 cup semi sweet chocolate chips
1/2 tsp vanilla extract
2 eggs

GLAZE (OPTIONAL)
2 tsp unsalted butter
2 oz (1/3 cup) white chocolate

Directions:
  1. In a large bowl, combine garbanzo bean flour, potato starch, brown sugar, baking powder, xanthan gum and salt. Mix well and set aside.
  2. In a large bowl, microwave butter and chocolate for 1 minute so that it is only partially melted. Stir until it is melted. Add eggs, one at a time, blending after each. Stir in vanillla extract. Slowly add the dry ingredients stirring until combined. Spread evenly in prepared pan. Let stand for 30 minutes. Bake in a preheated oven for 20-25 minutes or put a fork in the center and if it comes out with a little moist crumb adhering to it then it is done. Transfer to a rack to cool completely. Let cool for 15 minutes. Meanwhile, prepare glaze, if desired.
  3. GLAZE: In a small bowl, put the butter and chocolate in the microwave for 1 minute so that it is partially melted. Stir until its completely melted. Spread on warm brownies. Cool completely before cutting into squares. 


Monday, March 26, 2012

Chocolate Chip Muffins

Super delicious muffins! It is a must bake!!! :D

Makes 12 Muffins

Ingredients:
1 cup sweet sorghum flour
1/2 cup millet flour
1/2 cup tapioca flour
1 cup granulated sugar
2 tsp baking powder
1/4 tsp baking soda
1/8 tsp salt
1 tsp xanthan gum
1 cup chocolate chips
1 cup milk
8 tbsp (1 stick) unsalted butter, at room temperature
2 eggs
1 tsp watkins vanilla extract

Directions:
  1. Preheat the oven to 400 degrees F. Line a 12-cup muffin tin with paper muffin liners.
  2. Ina bowl, stir together the three types of flour, granulated sugar, baking powder, baking soda, salt, and xanthan gum. Add the chocolate chips and stir until they are coated with flour. Set aside.
  3. In a heavy duty mixer (kitchen aid mixer) mix together the milk, butter, eggs, and vanilla extract until smooth (the butter turned out clumpy because it wasn't softened all the way, this is okay!) Add the flour mixture and mix just to get the flour mixed. Then use a wooden spoon and turn about 10 times. Spoon the batter into the prepared muffin cups, filling each one to the top of the paper liner. Bake until the tops of the muffins spring back to the touch (or put a fork in the middle of a muffin and if it comes out clean it is done). Bake for about 18-20 minutes.
  4. Transfer the muffin tin to a wire rack and let it cool for 5 minutes. Then remove the muffins from the tin. Store the muffins in an airtight container on the counter for up to 3 days.
Enjoy!!! :D I know I will! <3

Wednesday, March 21, 2012

What's With all the Different Flours?!

So I always wondered what each flour does to the baking and I thought I would share what I now know. I got the information from a cook book Deliciously G-free by Elisabeth Hasselbeck. Everything I write is straight from the book. I recommend that you buy this book, it's very helpful and has great recipes.

Black Bean Flour:
Black bean flour works great with dense chocolate desserts because the rich taste of chocolate masks the flavor of the beans. Since beans are high in fiber, black bean flour holds moisture in chocolate cakes and brownies. I don't recommend this flour for vanilla-flavoured baked goods since the color and bean flavour will come through.

Brown Rice Flour:
I consider this the "all-purpose" flour for g-free baking. It has a mild flavour and is a great base for many recipes. Because it has a gritty, slightly granular texture, mix it with flours that are great at absorbing moisture, like black bean, coconut, and sorghum.

Coconut Flour:
This is one of my favourite flours. It's extremely high in fiber: just 2 tablespoons deliver 5 grams, a boon for celiac sufferers, who need to supplement their fiber intake. Even if you're not a fan of coconut, mixing small quantities of this golden-yellow flour with other flours improves texture of your cakes and cupcakes and helps ensure a moist crumb. Coconut flour gives my yellow cupcakes (pg 194) their lemony color and cuts the graininess of brown rice flour while keeping moisture in.

Millet Flour:
Millet flour is milled from a small grain that reminds me of tiny round popcorn kernels, but with a milder yet nutty flavour and a much lighter texture. Since some gluten-free flours don't absorb as much liquid as their glutenous counterparts, millet's drier chalky consistency and medium texture make it the perfect sponge for any baked good containing moist fruit or large amounts of heavy liquid, like my banana bread (page 213).

Potato Flour:
Like coconut flour, potato flour grabs moisture, but it contains less than half the amount of fiber found in coconut flour. It works well when combined with gritty flours like brown rice and sweet white rice to balance out the texture in cookie recipes and baked goods that contain less liquid. Use potato flour in moderation when mixing with other flours, as it burns easily.

Potato Starch:
Many g-free bakers sat that potato flour and potato starch at the same, but potato starch tends to be a lot finer in consistency and bright white in color, compared to the dull of-white of potato flour. Potato starch works well to enrich sauces and provides a crisp-on-the-outside, soft-inside texture for waffles.

Sweet Sorghum Flour:
Sorghum is grain harvested from a grass, and is America's third largest grain crop. Like gluten-full whole wheat flour, sweet sorghum flour has a dark, speckled cinnamon appearance and a course texture. It has a unique mineral profile that is high in iron (for healthy blood and heart), potassium (crucial for hydration), and phosphorus (important for growing bones and teeth). It's the perfect base for quick breads, muffins, pancakes, and biscuits.

Sweet White Rice Flour:
Sweet white rice flour reminds me of powdery white cake flour, traditionally used to create the fine crumb for which dainty white cakes are famous. I use sweet rice flour as the main flour in my brownies because, much like cake flour, it has a lighter texture and is higher in starch than brown rice flour. It also seems to magnify the flavour and mimic the texture of the melted-chocolate.

Tapioca Starch:
Tapioca starch has the lightest, finest texture of all the baking flours. It's responsible for that irrestible "crackle" on top of my brownies (page 209). It also makes the dreamy-smooth pudding filling that you'll find in recipes like my banana cream pie (page 202), and it helps to crisp the outside of my signature chocolate chip cookies (page 215).

Subsitutes for Gluten:
Gluten is a combination of two binding proteins, gliadin and glutenin. Found in wheat, rye, and barley the very ingredients to avoid on a g-free diet - these proteins are what give bread its chewy bounce and cakes and brownies their delicate, moist crumb. Without gluten, or without the major players that step in to do its work, most baked goods crumble and lack that tender, moist, or chewy texture that makes homemade treats so good. Xanthan gum and Guar gum have been pinch-hitting for gluten in baking for some time. If you've done and g-free baking up to this point, you've probably encountered them in recipe ingredient lists. But if you've not heard of them before, don't be intimidated. Here's what you need to know:
  1. Xanthan gum is a binder made from the fermentation of sugars isolated from corn. Traditionally it is used in salad dressings to help them pour well and prevent separation, and it is added to toothpaste and ice creams to help those products maintain their thick mousselike consistency. (If you've ever had xanthan gum clinging to your fingertips, then washed your hands, you've noticed an interesting slippery flim forming on your fingers before it melts away). In baked goods, xanthan gum increases the viscosity of the batter. Xanthan gum is sold in powder form, usually in 5-6 ounce bags. Since it's used in small amounts, one bag will be enough to supply you with great baked goods for many months to come.
  2. Guar gum is derived from the seed of a plant grown in India and is typically found in powder form (like xanthan gum) in health food and specialty food stores. Guar gum has eight times the thickening power of standard starches, like corn or potato, and gives more bounce to baked goods. Commercially, it's used for a thickener in hot and cold drinks, and you'll find it in your favourite summertime Popsicles.
Both xanthan and guar gum range wildly in price - from $3.50 a bag to $12 per 8 ounces, depending on where you buy it. Look for deals on the Internet, but remember that there's no need to order either one in bulk since most baked goods require only a teaspoon.

In recipes, xanthan and guar gum add the binding and moisturizing properties that are lost without the gluten from wheat, rye, and barley. In most cases you can use xanthan or guar gum interchangeably in cakes, cookies, and breakfast foods like pancakes and waffles. Using too much will create a gummy, almost rubbery baked good, and using too little will mean crumble city - that dry texture that gives g-free baked goods a bad rap. As a rule of thumb, start with 1 teaspoon xanthan or guar gum when converting your favourite traditional cookie or cake recipe.
Just like the g-free flours, xanthan gum and guar gum store well in a dark, cool place. Xanthan gum has a long shelf life, up to two years, and guar gum up to eighteen months, so once you stock your baking shelf, you'll have a go-to ingredient any time you're craving brownies or chocolate chip cookies warm from the oven. I usually mark the date of purchase somewhere on the container, to eliminate guesswork later on.