So it has been 9 months since I have been off of eating gluten. This past month I went to see this lady Candace Brown for my wrist. She fixed that and I told her that I had Celiac Disease and she told me No you don't, no one has it. I was really shocked to hear this and definetly skeptical. Anyways she felt my stomach area and she said that my bowels were twisted and that is why I was having problems with digesting gluten. So she untwisted them and said you can eat gluten now. I just have to make sure I eat fibre.
So I went home and just looked at my mom and said she is crazy! She can't know that I don't have Celiac disease! So for that first week I didn't eat gluten I was to skeptical. Well know I have been bits and pieces here and there. I had 2 crackers yesterday and 1 cracker today and I feel great! Last week I had a bowl of Campbells cream of chicken soup with 4 crackers and I felt great afterwards! Crazy right! I even had hot chocolate that said MAY CONTAIN WHEAT and once again I felt fine.
I do have an appointment with the specialist for Celiac disease in January and in December I have to go get my blood tested. So I am testing this out. If my numbers are below 20 that means I am normal and fine and I don't have Celiac Disease but if my numbers are way out there then I do.
I am praying to God that I don't because it would make my life easier and as well as my parents. I am okay with either outcome because I have been living without gluten for over 9 months. So whatever Gods answer is I will accept it with grace. I am okay with living without gluten but I do miss being able to go out to a restaurant and ordering whatever I want on the menu without worrying about whether it will be gluten free or contaminated with gluten.
I am looking forward to January and I will let you know my results :)
Monday, November 5, 2012
Sunday, September 23, 2012
Homemade Tomato Soup with Grilled Cheese Croutons
So I was watching the Chew this past week when Carla was making this soup that looked so amazing!! I told my mom she had to make it sometime and when I got home from work she was starting to make it :) I was so excited! So here is the recipe :)
Ingredients:
2 1/2 pounds ripe tomatoes (red or yellow) chopped
1 1/2 cup Yellow onion (chopped)
3 tablespoons extra virgin olive oil
2 garlic cloves
6 cup chicken stock
1/2 cup heavy cream
2 teaspoon thyme (fresh)
1 yellow pepper (chopped)
1 rib celery (chopped)
Salt and Pepper
2-4 basil leaves
Directions:
- In a medium pot, add the olive oil and sweat the onions, celery, and peppers. When the onions are soft and translucent, add the tomatoes, garlic and thyme, then simmer until the tomatoes are tender, about 20 minutes.
- Add the stock and simmer for about 20-30 minutes.
- working in small batches, puree soup in a blender with basil until silky smooth.
- Add cream and stir until heated through. Adjust seasoning with salt and pepper.
- For the grilled cheese croutons - place 2 slices of cheese inbetween 2 slices of white bread. Heat a nonsitck skillet over medium heat and add a dab of butter. Toast the grilled cheese sandwiches on both sides until golden brown and the cheese is melted. Squish the bread flat while it is toasting so it gets crunchier and flatter.
- Remove sandwiches from pan and slice into 1 inch croutons.
- Ladle soup into bowl and top with a couple of grilled cheese croutons.

Friday, September 14, 2012
Chocolate Devil's Food Cupcakes
Ingredients:
1 cup boiling - hot water
1 cup cocoa powder
1 cup brown rice flower
1/2 cup sorghum flour
1/2 cup potato flour
2 teaspooon baking soda
1 teaspoon xanthan gum
1/8 teaspoon salt
2 cups granulated sugar
8 tablespoons (1 stick) salted butter, at room temperature
2 eggs, at room temperature
1 teaspoon vanilla extract
1 cup buttermilk
Directions:
The icing I chose:
Chocolate Buttercream Icing:
Ingredients:
8 tbsp (1 stick) butter, at room temperature.
1/2 cup cocoa powder
1 teaspoon vanilla extract
1 cup icing sugar
2 tbsp milk
Directions:
1 cup boiling - hot water
1 cup cocoa powder
1 cup brown rice flower
1/2 cup sorghum flour
1/2 cup potato flour
2 teaspooon baking soda
1 teaspoon xanthan gum
1/8 teaspoon salt
2 cups granulated sugar
8 tablespoons (1 stick) salted butter, at room temperature
2 eggs, at room temperature
1 teaspoon vanilla extract
1 cup buttermilk
Directions:
- Preheat oven to 400 degrees F. Line a 12-cup muffin tin with cupcake liners.
- In a large bowl, whisk the hot water and cocoa powder together.
- In another large bowl, stir together the brown rice flour, sorghum flour, potato flour, baking soda, xanthan gum and salt.
- Add the sugar and butter to the cocoa mixture. With an electric mixer on high speed, beat until a smooth, shiny mixture forms, about 30 seconds. Then beat in the eggs and vanilla extract on low-speed until incorporated.
- Add half of the flour mixture and beat on low speed just until combined; there may be dry spots. Add 1/2 cup of the buttermilk, ixing on low speed until just incorporated. Repeat with the remaining flour mixture and the remaining buttermilk and fill 4 more cupcake liners; set aside. Bake for 15-20 minutes, until the centers of the cupcakes are firm to the touch.
- Remove the cupcakes from the muffin tin and let them cool completely on a wire rack. Repeat with the remaining batter.
- Once the cupcakes are cool, use a small spatula or butter knife to ice them with your choice of icing. Store in an airtight container in the regrigerator for up to 5 days.
The icing I chose:
Chocolate Buttercream Icing:
Ingredients:
8 tbsp (1 stick) butter, at room temperature.
1/2 cup cocoa powder
1 teaspoon vanilla extract
1 cup icing sugar
2 tbsp milk
Directions:
- In a large bowl, cream the butter with an electric mixer. Add the cocoa powder and vanilla. Gradually add the icing sugar, beating well on medium speed and scraping the sides and bottom of the bowl often. When all the sugar has been mixed in, the icing will appear dry. Add the milk and beat on medium speed until the icing is light and fluffy.
- Keep the bowl covered with a damp cloth until ready to use. For best results, also keep the bowl of icing in the refrigerator when not in use.
- Refrigerated in an airtight container, this icing can be stored for 2 weeks. Bring back to room temperature and rewhip before using.
Wednesday, May 2, 2012
GF Boterkoek

Okay, so for the past few days I have been trying to figure out a way to make a good boterkoek but gluten-free...and I think I have found it! :) My mom decided on the measurements (So I must admit not everything is my idea) ;)
9" Round Pie Plate
Ingredients:
1 1/2 cups white rice flour
1/4 cup almond flour
1/4 cup tapioca starch
1 tsp xanthan gum
1/2 tsp baking powder
1 cup granulated sugar
1 1/2 tsp almond extract
3/4 cup butter-softened
1 egg
Directions:
- Mix the white rice flour, almond flour, tapioca starch, xanthan gum, baking powder, and sugar.
- Beat the egg in a cup and save a tiny bit to rub on the top of the boterkoek.
- In an electric mixer, mix the butter, egg and flour mixture together until it forms a ball.
- In a round pie plate spread and press the dough down evenly. Then rub the remaining egg on top.

One is gluten free and the other is made with wheat! (but i think one tastes better but that's probably because I can't actually compare and the last time I had a regular piece of boterkoek was probably 6 months ago ;)
Monday, April 30, 2012
5 months being GF
About 6 months ago I had a doctors appointment because I was dizzy all the time and well she sent me for blood work for Anemia and Celiac Disease. I was totally flored when she said Celiac disease and I just laughed. I thought she was nuts, quite literally. I had no symptoms (or so I thought) and so I figured oh well get the test done and it will come back negative. So 2 weeks later I came back for the results. Sure enough I had Anemia AND Celiac! I was so shocked. The doctor told me I would have to go for a biopsy to 100% proof it. She told me that anemia was connected to Celiac disease and that it would most likely be cured.
So now 6 months later and 5 months of being totally off gluten (except for the times where I by accidentally had some) I am a new person! And I'm not joking. I feel amazing, so much energy for life! I always feel great after I eat (no bloating, sharp pains in my shoulder when I breathe, and no joint pain = feeling amazing!!!) About 1 month ago I noticed my hair changing. At the time I had curly hair, like perfect ringlets and all! My hair started going straight...STRAIGHT! At first I was upset, I loved my curls. But after a while I knew I had to embrace it like all of the other changes in my life. So I decided to cut it short! Yah its a bit wavy but nothing like when it was curly.


So all of you people who have stomach pain, bloating, joint pain, or really any pain its most likely an allergy to something if it continues everyday and constantly. And even if you don't, being of gluten will still make you feel better, it's healthier and the wheat that you are eating isn't the same it used to be 50 years ago. I recommend anybody to go off of gluten to just be healthier! Some people say it is hard to do but I took it on with excitement and adventure! :)
So now 6 months later and 5 months of being totally off gluten (except for the times where I by accidentally had some) I am a new person! And I'm not joking. I feel amazing, so much energy for life! I always feel great after I eat (no bloating, sharp pains in my shoulder when I breathe, and no joint pain = feeling amazing!!!) About 1 month ago I noticed my hair changing. At the time I had curly hair, like perfect ringlets and all! My hair started going straight...STRAIGHT! At first I was upset, I loved my curls. But after a while I knew I had to embrace it like all of the other changes in my life. So I decided to cut it short! Yah its a bit wavy but nothing like when it was curly.

Before it went straight

And after it went straight
So all of you people who have stomach pain, bloating, joint pain, or really any pain its most likely an allergy to something if it continues everyday and constantly. And even if you don't, being of gluten will still make you feel better, it's healthier and the wheat that you are eating isn't the same it used to be 50 years ago. I recommend anybody to go off of gluten to just be healthier! Some people say it is hard to do but I took it on with excitement and adventure! :)
Chocolate Chip Cookies

Makes 4 dozen cookies
Ingredients:
1 1/2 cups brown rice flour
1/2 cup potato flour
1/4 cup tapioca starch
1/4 cup millet flour
1 tsp baking soda
1 tsp xanthan gum
1/2 tsp baking powder
1/4 tsp salt
1 cup margarine, at room temperature
1 cup packe brown sugar
3/4 cup granulated sugar
2 eggs
1 tsp vanilla extract
2 cups chocolate chips


Directions:
- Preheat oven to 350 degrees F.
- Place the brown rice flour, potato flour, tapioca starch, millet flour, baking soda, xanthan gum, baking powder, and salt in a medium-size bowl. Stir until well combined, and set aside.
- Place the butter, brown sugar, and granulated sugar in a large bowl. Using an electric mixer, beat on medium speed until the mixture is light brown and fluffy. Add the eggs and vanilla, and beat again on medium speed until just combined.
- Sprinkle the flour mixture over the butter mixture, and add the chocolate chips. Using a wooden spoon, stir until a soft dough forms, about 10 turns of the spoon. Using a tablespoon measure, drop the dough onto the cookie sheets, spacing them 2 inches apart.
- Bake for 8-10 minuts, until the edges are lightly browned but the centers are still soft. Cool for 2 minutes on the cookie sheets before transfering the cookies to a wire rack to cool completely. Store in airtight container at room temperature for up to 5 days, or transfer to a zipper-lock bag and freeze for up to 6 months.

Wednesday, April 25, 2012
Chewy Blondies

Preheat oven to 350 degrees F
13-by 9-inch baking pan, lightly greased
Ingredients:
3/4 cup brown rice flour
1/2 cup garbanzo bean flour
1/4 cup tapioca starch
2 tsp baking powder
2 tsp xanthan gum
1/4 tsp salt
1/2 tsp butter, softened
3/4 cup granulated sugar
1/3 cup packed brown sugar
2 eggs
1 tsp vanilla extract
1 cup white chocolate chips
Directions:
- In a large bowl mix together brown rice flour, garbanzo bean flour, tapioca starch, baking powder, xanthan gum and salt. Set aside.
- In a separate bowl, using an electric mixer, cream butter, granulated sugar and brown sugar. Add eggs and vanilla extract. Beat until light and fluffy. Gradually beat in dry ingredients, mixing just until smooth. Stir in white chocolate chips. Spoon into prepared pan, spread to edges and smooth top with a rubber spatula. Let stand for 30 minutes.
- Bake in preheated oven for 35-45 minutes or until wooden skewer inserted in the center comes out clean. Transfer to cooling rack and let cool completely. Cut into bars.
Saturday, April 14, 2012
Strawberries and Cream Shake

Serves 1
Ingredients:
1 1/2 cups fresh or frozen strawberries
1 8 ounce container plain 2% yogurt
1/4 cup skim milk or gluten-free vanilla soy milk
2 tbsp granulated sugar
1 tsp vanilla extract
4 ice cubes
Directions:
Place all the ingredients in a blender and blend on high speed until smooth. Serve immediately.

Brown Bread

9- by 5- inch (2L) loaf pan, lightly greased
Ingredients:
1 1/4 cups brown rice flour
1/2 cup sorghum flour
1/2 cup cornstarch
1/2 cup rice bran
1 tbsp xanthan gum
1 tbsp bread machine or instant yeast
1 1/4 tsp salt
1 cup water
1 tsp cider vinegar
2 tbsp vegetable oil
2 tbsp liquid honey
2 tbsp packed brown sugar
3 eggs
Directions:
- In a large bowl or plastic bag, combine brown rice flour, sorghum flour, cornstarch, rice bran, xanthan gum, yeast, and salt. Mix well and set aside.
- In a separate bowl, using a heavy-duty electirc mixer with paddle attachment, combine water, vinegar, oil, honey, brown sugar, and eggs until well blended.
- With the mixer on lowest speed, slowly add the dry ingredients to the honey mixture until combined. With a rubber spatula, scrape the bottom and sides of the bowl. With the mixer on medium speed, beat for 4 minutes.
- Spoon into prepared pan. Let rise, uncovered, in a warm, draft-free place for 60-75 minutes or until the dough has risen to the top of the pan. Meanwhile, preheat oven to 350 degrees F. Bake for 35 to 45 minutes or until the loaf sounds hollow when tapped on the bottom or stick a fork in it and if it comes out clean it is done.

Variations: For a more flavored bread, substitute 2 tbsp fancy molasses for the brown sugar.
The rice bran can be replace by an equal amount of brown or white rice flour.
Monday, April 9, 2012
Yellow Birthday Cake
Makes 2 9-inch round cakes
Ingredients:
Nonstick cooking spray (for cake pans)
1 cup brown rice flour
1/2 cup coconut flour
1/2 cup tapioca starch
1 tbsp baking powder
1 tsp xanthan gum
1/4 tsp salt
1 1/2 cup granulated sugar
1 cup 2% milk
1/2 cup canola oil
2 eggs, lightly beaten
2 tsp vanilla extract
Directions:
Ingredients:
Nonstick cooking spray (for cake pans)
1 cup brown rice flour
1/2 cup coconut flour
1/2 cup tapioca starch
1 tbsp baking powder
1 tsp xanthan gum
1/4 tsp salt
1 1/2 cup granulated sugar
1 cup 2% milk
1/2 cup canola oil
2 eggs, lightly beaten
2 tsp vanilla extract
Directions:
- Preheat oven to 350 degrees F. Coat a two 9-inch cake pans with cooking spray.
- Place the brown rice flour, coconut flour, tapioca starch, baking powder, xanthan gum, and salt in a large bowl, and whisk to combine. Make a well in the center of the flour. Add the sugar, milk, canola oil, eggs, and vanilla extract. Using an electric mixer, beat on low speed for about 1 minute until the batter is very smooth. Divide teh batter between the prepared cake pans.
- Bake for 20 to 25 minutes, until the cakes spring back when the tops are pressed or until a toothpick tester comes out clean. Remove the cakes from their forms and let the cool completley on a wire rack.
- Once the cakes are cool, use a small spatula or a butter knife to ice them with your favorite icing. Store in an airtight container in the refigerator for up to 5 days.
Fudgy Brownies

Makes 16 brownies
Preheat oven to 350 degrees F
8-inch (2L) square pan, lightly greased
Ingredients:
1/3 cup Garbanzo Flour
2 tbsp potato starch
1 cup packed brown sugar
1/2 tsp baking powder
1/2 tsp xanthan gum
1/8 tsp salt
1/2 cup unsalted butter
1/3 cup semi sweet chocolate chips
1/2 tsp vanilla extract
2 eggs
GLAZE (OPTIONAL)
2 tsp unsalted butter
2 oz (1/3 cup) white chocolate
Directions:
- In a large bowl, combine garbanzo bean flour, potato starch, brown sugar, baking powder, xanthan gum and salt. Mix well and set aside.
- In a large bowl, microwave butter and chocolate for 1 minute so that it is only partially melted. Stir until it is melted. Add eggs, one at a time, blending after each. Stir in vanillla extract. Slowly add the dry ingredients stirring until combined. Spread evenly in prepared pan. Let stand for 30 minutes. Bake in a preheated oven for 20-25 minutes or put a fork in the center and if it comes out with a little moist crumb adhering to it then it is done. Transfer to a rack to cool completely. Let cool for 15 minutes. Meanwhile, prepare glaze, if desired.
- GLAZE: In a small bowl, put the butter and chocolate in the microwave for 1 minute so that it is partially melted. Stir until its completely melted. Spread on warm brownies. Cool completely before cutting into squares.


Monday, March 26, 2012
Chocolate Chip Muffins

Makes 12 Muffins
Ingredients:
1 cup sweet sorghum flour
1/2 cup millet flour
1/2 cup tapioca flour
1 cup granulated sugar
2 tsp baking powder
1/4 tsp baking soda
1/8 tsp salt
1 tsp xanthan gum
1 cup chocolate chips
1 cup milk
8 tbsp (1 stick) unsalted butter, at room temperature
2 eggs
1 tsp watkins vanilla extract
Directions:
- Preheat the oven to 400 degrees F. Line a 12-cup muffin tin with paper muffin liners.
- Ina bowl, stir together the three types of flour, granulated sugar, baking powder, baking soda, salt, and xanthan gum. Add the chocolate chips and stir until they are coated with flour. Set aside.
- In a heavy duty mixer (kitchen aid mixer) mix together the milk, butter, eggs, and vanilla extract until smooth (the butter turned out clumpy because it wasn't softened all the way, this is okay!) Add the flour mixture and mix just to get the flour mixed. Then use a wooden spoon and turn about 10 times. Spoon the batter into the prepared muffin cups, filling each one to the top of the paper liner. Bake until the tops of the muffins spring back to the touch (or put a fork in the middle of a muffin and if it comes out clean it is done). Bake for about 18-20 minutes.
- Transfer the muffin tin to a wire rack and let it cool for 5 minutes. Then remove the muffins from the tin. Store the muffins in an airtight container on the counter for up to 3 days.


Wednesday, March 21, 2012
What's With all the Different Flours?!
So I always wondered what each flour does to the baking and I thought I would share what I now know. I got the information from a cook book Deliciously G-free by Elisabeth Hasselbeck. Everything I write is straight from the book. I recommend that you buy this book, it's very helpful and has great recipes.
Black Bean Flour:
Black bean flour works great with dense chocolate desserts because the rich taste of chocolate masks the flavor of the beans. Since beans are high in fiber, black bean flour holds moisture in chocolate cakes and brownies. I don't recommend this flour for vanilla-flavoured baked goods since the color and bean flavour will come through.
Brown Rice Flour:
I consider this the "all-purpose" flour for g-free baking. It has a mild flavour and is a great base for many recipes. Because it has a gritty, slightly granular texture, mix it with flours that are great at absorbing moisture, like black bean, coconut, and sorghum.
Coconut Flour:
This is one of my favourite flours. It's extremely high in fiber: just 2 tablespoons deliver 5 grams, a boon for celiac sufferers, who need to supplement their fiber intake. Even if you're not a fan of coconut, mixing small quantities of this golden-yellow flour with other flours improves texture of your cakes and cupcakes and helps ensure a moist crumb. Coconut flour gives my yellow cupcakes (pg 194) their lemony color and cuts the graininess of brown rice flour while keeping moisture in.
Millet Flour:
Millet flour is milled from a small grain that reminds me of tiny round popcorn kernels, but with a milder yet nutty flavour and a much lighter texture. Since some gluten-free flours don't absorb as much liquid as their glutenous counterparts, millet's drier chalky consistency and medium texture make it the perfect sponge for any baked good containing moist fruit or large amounts of heavy liquid, like my banana bread (page 213).
Potato Flour:
Like coconut flour, potato flour grabs moisture, but it contains less than half the amount of fiber found in coconut flour. It works well when combined with gritty flours like brown rice and sweet white rice to balance out the texture in cookie recipes and baked goods that contain less liquid. Use potato flour in moderation when mixing with other flours, as it burns easily.
Potato Starch:
Many g-free bakers sat that potato flour and potato starch at the same, but potato starch tends to be a lot finer in consistency and bright white in color, compared to the dull of-white of potato flour. Potato starch works well to enrich sauces and provides a crisp-on-the-outside, soft-inside texture for waffles.
Sweet Sorghum Flour:
Sorghum is grain harvested from a grass, and is America's third largest grain crop. Like gluten-full whole wheat flour, sweet sorghum flour has a dark, speckled cinnamon appearance and a course texture. It has a unique mineral profile that is high in iron (for healthy blood and heart), potassium (crucial for hydration), and phosphorus (important for growing bones and teeth). It's the perfect base for quick breads, muffins, pancakes, and biscuits.
Sweet White Rice Flour:
Sweet white rice flour reminds me of powdery white cake flour, traditionally used to create the fine crumb for which dainty white cakes are famous. I use sweet rice flour as the main flour in my brownies because, much like cake flour, it has a lighter texture and is higher in starch than brown rice flour. It also seems to magnify the flavour and mimic the texture of the melted-chocolate.
Tapioca Starch:
Tapioca starch has the lightest, finest texture of all the baking flours. It's responsible for that irrestible "crackle" on top of my brownies (page 209). It also makes the dreamy-smooth pudding filling that you'll find in recipes like my banana cream pie (page 202), and it helps to crisp the outside of my signature chocolate chip cookies (page 215).
Subsitutes for Gluten:
Gluten is a combination of two binding proteins, gliadin and glutenin. Found in wheat, rye, and barley the very ingredients to avoid on a g-free diet - these proteins are what give bread its chewy bounce and cakes and brownies their delicate, moist crumb. Without gluten, or without the major players that step in to do its work, most baked goods crumble and lack that tender, moist, or chewy texture that makes homemade treats so good. Xanthan gum and Guar gum have been pinch-hitting for gluten in baking for some time. If you've done and g-free baking up to this point, you've probably encountered them in recipe ingredient lists. But if you've not heard of them before, don't be intimidated. Here's what you need to know:
In recipes, xanthan and guar gum add the binding and moisturizing properties that are lost without the gluten from wheat, rye, and barley. In most cases you can use xanthan or guar gum interchangeably in cakes, cookies, and breakfast foods like pancakes and waffles. Using too much will create a gummy, almost rubbery baked good, and using too little will mean crumble city - that dry texture that gives g-free baked goods a bad rap. As a rule of thumb, start with 1 teaspoon xanthan or guar gum when converting your favourite traditional cookie or cake recipe.
Just like the g-free flours, xanthan gum and guar gum store well in a dark, cool place. Xanthan gum has a long shelf life, up to two years, and guar gum up to eighteen months, so once you stock your baking shelf, you'll have a go-to ingredient any time you're craving brownies or chocolate chip cookies warm from the oven. I usually mark the date of purchase somewhere on the container, to eliminate guesswork later on.
Black Bean Flour:
Black bean flour works great with dense chocolate desserts because the rich taste of chocolate masks the flavor of the beans. Since beans are high in fiber, black bean flour holds moisture in chocolate cakes and brownies. I don't recommend this flour for vanilla-flavoured baked goods since the color and bean flavour will come through.
Brown Rice Flour:
I consider this the "all-purpose" flour for g-free baking. It has a mild flavour and is a great base for many recipes. Because it has a gritty, slightly granular texture, mix it with flours that are great at absorbing moisture, like black bean, coconut, and sorghum.
Coconut Flour:
This is one of my favourite flours. It's extremely high in fiber: just 2 tablespoons deliver 5 grams, a boon for celiac sufferers, who need to supplement their fiber intake. Even if you're not a fan of coconut, mixing small quantities of this golden-yellow flour with other flours improves texture of your cakes and cupcakes and helps ensure a moist crumb. Coconut flour gives my yellow cupcakes (pg 194) their lemony color and cuts the graininess of brown rice flour while keeping moisture in.
Millet Flour:
Millet flour is milled from a small grain that reminds me of tiny round popcorn kernels, but with a milder yet nutty flavour and a much lighter texture. Since some gluten-free flours don't absorb as much liquid as their glutenous counterparts, millet's drier chalky consistency and medium texture make it the perfect sponge for any baked good containing moist fruit or large amounts of heavy liquid, like my banana bread (page 213).
Potato Flour:
Like coconut flour, potato flour grabs moisture, but it contains less than half the amount of fiber found in coconut flour. It works well when combined with gritty flours like brown rice and sweet white rice to balance out the texture in cookie recipes and baked goods that contain less liquid. Use potato flour in moderation when mixing with other flours, as it burns easily.
Potato Starch:
Many g-free bakers sat that potato flour and potato starch at the same, but potato starch tends to be a lot finer in consistency and bright white in color, compared to the dull of-white of potato flour. Potato starch works well to enrich sauces and provides a crisp-on-the-outside, soft-inside texture for waffles.
Sweet Sorghum Flour:
Sorghum is grain harvested from a grass, and is America's third largest grain crop. Like gluten-full whole wheat flour, sweet sorghum flour has a dark, speckled cinnamon appearance and a course texture. It has a unique mineral profile that is high in iron (for healthy blood and heart), potassium (crucial for hydration), and phosphorus (important for growing bones and teeth). It's the perfect base for quick breads, muffins, pancakes, and biscuits.
Sweet White Rice Flour:
Sweet white rice flour reminds me of powdery white cake flour, traditionally used to create the fine crumb for which dainty white cakes are famous. I use sweet rice flour as the main flour in my brownies because, much like cake flour, it has a lighter texture and is higher in starch than brown rice flour. It also seems to magnify the flavour and mimic the texture of the melted-chocolate.
Tapioca Starch:
Tapioca starch has the lightest, finest texture of all the baking flours. It's responsible for that irrestible "crackle" on top of my brownies (page 209). It also makes the dreamy-smooth pudding filling that you'll find in recipes like my banana cream pie (page 202), and it helps to crisp the outside of my signature chocolate chip cookies (page 215).
Subsitutes for Gluten:
Gluten is a combination of two binding proteins, gliadin and glutenin. Found in wheat, rye, and barley the very ingredients to avoid on a g-free diet - these proteins are what give bread its chewy bounce and cakes and brownies their delicate, moist crumb. Without gluten, or without the major players that step in to do its work, most baked goods crumble and lack that tender, moist, or chewy texture that makes homemade treats so good. Xanthan gum and Guar gum have been pinch-hitting for gluten in baking for some time. If you've done and g-free baking up to this point, you've probably encountered them in recipe ingredient lists. But if you've not heard of them before, don't be intimidated. Here's what you need to know:
- Xanthan gum is a binder made from the fermentation of sugars isolated from corn. Traditionally it is used in salad dressings to help them pour well and prevent separation, and it is added to toothpaste and ice creams to help those products maintain their thick mousselike consistency. (If you've ever had xanthan gum clinging to your fingertips, then washed your hands, you've noticed an interesting slippery flim forming on your fingers before it melts away). In baked goods, xanthan gum increases the viscosity of the batter. Xanthan gum is sold in powder form, usually in 5-6 ounce bags. Since it's used in small amounts, one bag will be enough to supply you with great baked goods for many months to come.
- Guar gum is derived from the seed of a plant grown in India and is typically found in powder form (like xanthan gum) in health food and specialty food stores. Guar gum has eight times the thickening power of standard starches, like corn or potato, and gives more bounce to baked goods. Commercially, it's used for a thickener in hot and cold drinks, and you'll find it in your favourite summertime Popsicles.
In recipes, xanthan and guar gum add the binding and moisturizing properties that are lost without the gluten from wheat, rye, and barley. In most cases you can use xanthan or guar gum interchangeably in cakes, cookies, and breakfast foods like pancakes and waffles. Using too much will create a gummy, almost rubbery baked good, and using too little will mean crumble city - that dry texture that gives g-free baked goods a bad rap. As a rule of thumb, start with 1 teaspoon xanthan or guar gum when converting your favourite traditional cookie or cake recipe.
Just like the g-free flours, xanthan gum and guar gum store well in a dark, cool place. Xanthan gum has a long shelf life, up to two years, and guar gum up to eighteen months, so once you stock your baking shelf, you'll have a go-to ingredient any time you're craving brownies or chocolate chip cookies warm from the oven. I usually mark the date of purchase somewhere on the container, to eliminate guesswork later on.
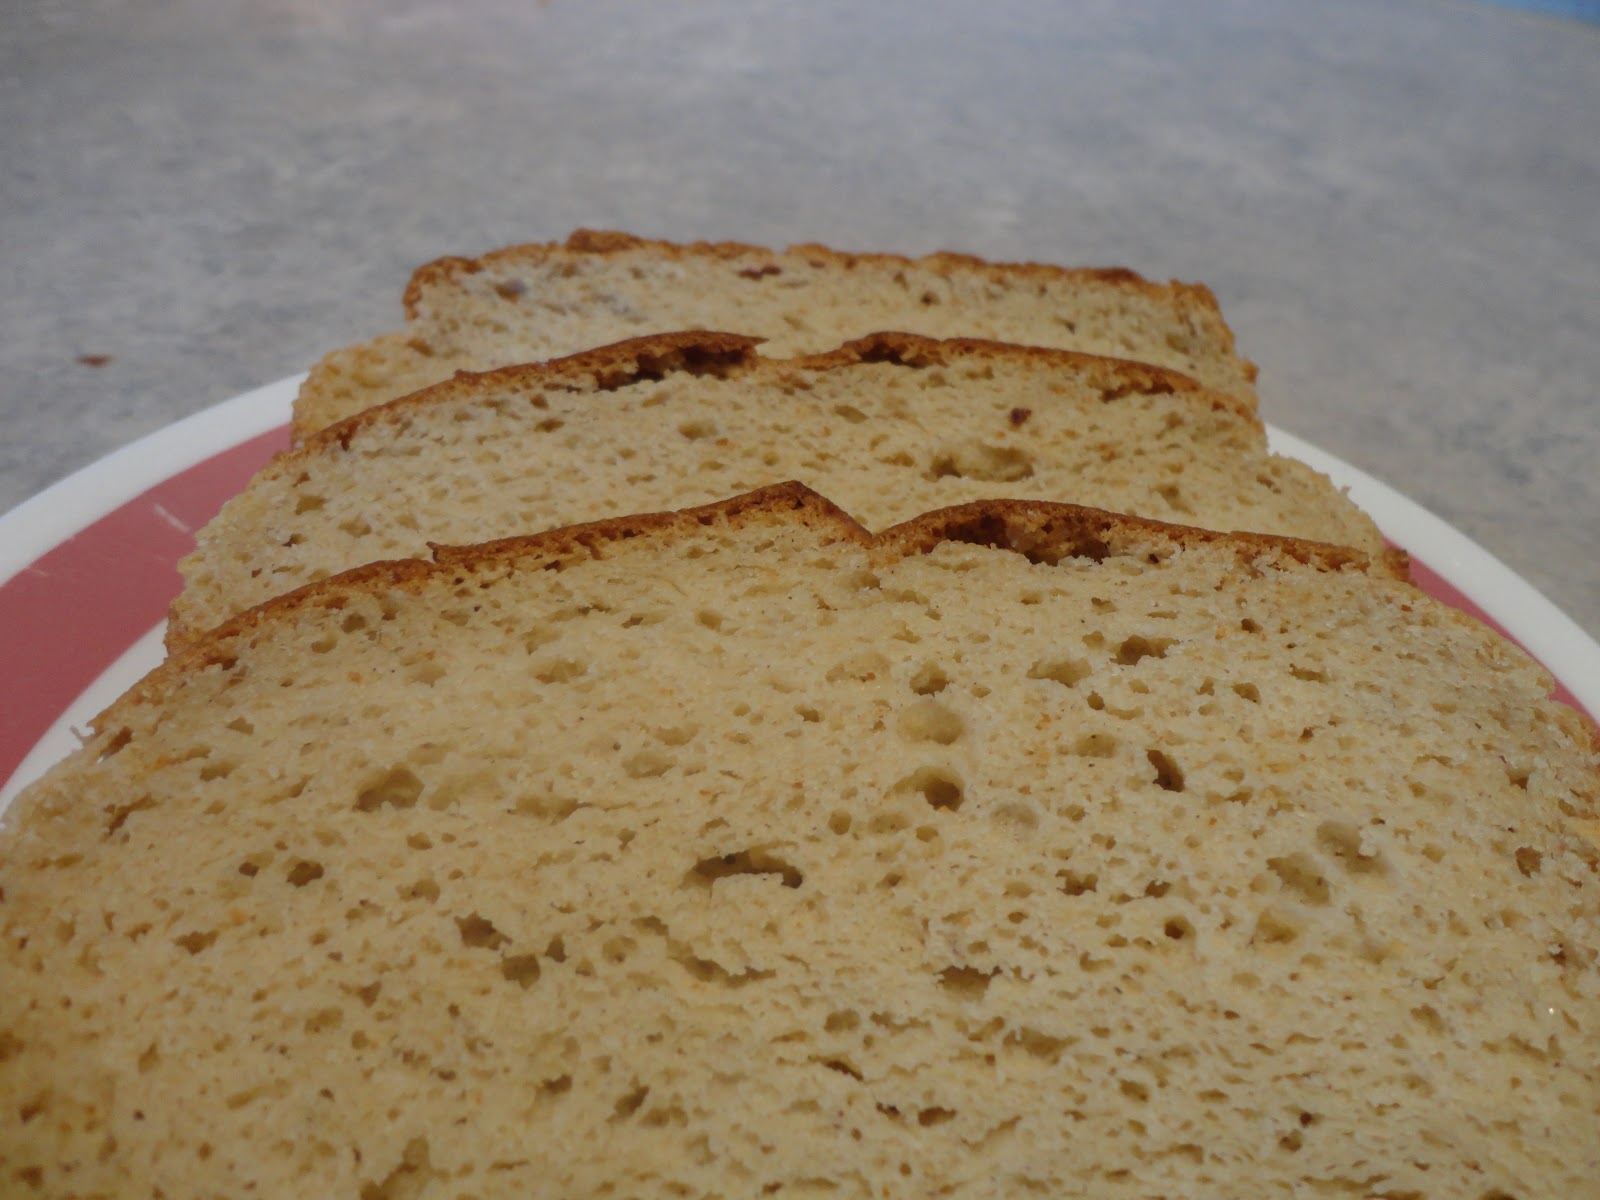
The Difference Between my 2 White Breads
Okay so back in February I made a Gluten free White bread (you can see the post on February 23). AND on March 19 I made a white bread in a loaf pan. So I just wanted to tell you all which one in my mind was WAY better. I left the white bread i made in a loaf out for 2 days now and it is still pretty fresh! So awesome, the taste is better than the other bread and it isn't so crumby! So I will never make the bread I posted about in February 23. That was my first attempt at making bread and I still think it turned out good just not great! So I really recommend the white bread in a loaf pan just because it can stay in a ziploc bag for 2 days without needing to go in the freezer! :D When I get back from Ontario I am going to try this recipe in the bread machine and see how it will turn out!
Okay so I am adding on to this post. I made the loaf bread on monday. 2 days it sat on the counter in a ziploc bag and then I threw it in the freezer. The next day I toasted it. After it had been toasted and it was brown and hot, i put nutella on it and took a bite... super delicious! It was moist and not crumby and just oh so good!! I really recommend this bread :)
Okay so I am adding on to this post. I made the loaf bread on monday. 2 days it sat on the counter in a ziploc bag and then I threw it in the freezer. The next day I toasted it. After it had been toasted and it was brown and hot, i put nutella on it and took a bite... super delicious! It was moist and not crumby and just oh so good!! I really recommend this bread :)
Monday, March 19, 2012
White Bread made in a Loaf Pan
I got this recipe from 125 Best Gluten - Free Recipes by Donna Washburn and Heather Butt

 Makes 1 loaf
9-by 5-inch (2L) loaf pan, lightly greased
Ingredients:
1 3/4 cups rice flour
1/2 cup potato starch
1/4 cup tapioca starch
1/4 cup skim milk powder
2 tbsp sugar
2 1/2 tsp xanthan gum
2 tsp bread machine or instant yeast
1 1/4 tsp salt
1 cup water
2 tsp cider vinegar (I used white vinegar)
2 tbsp vegetable oil
2 eggs
2 egg whites
Directions:
Remember to thoroughly mix the dry ingredients before adding to the liquids because they are powder-fine and could clump together.


9-by 5-inch (2L) loaf pan, lightly greased
Ingredients:
1 3/4 cups rice flour
1/2 cup potato starch
1/4 cup tapioca starch
1/4 cup skim milk powder
2 tbsp sugar
2 1/2 tsp xanthan gum
2 tsp bread machine or instant yeast
1 1/4 tsp salt
1 cup water
2 tsp cider vinegar (I used white vinegar)
2 tbsp vegetable oil
2 eggs
2 egg whites
Directions:
- In a large bowl or plastic bag, combine rice flour, potato starch, tapioca starch, milk powder, sugar, xanthan gum, yeast and salt. Mix well and set aside.
- In a separate bowl, using a heavy-duty mixer with paddle attachment, combine water, vinegar, oil, eggs and egg whites until well blended.
- With the mixer on lowest speed, slowly add the dry ingredients until combined. With a rubber spatula, scrape the bottom and sides of the bowl. With the mixer on medium speed, beat for 4 minutes.
- Spoon into prepared pan. Let rise, uncoverd, in a warm, draft-free place for 60-75 minutes or until dough has risen to the top of the pan. Meanwhile, preheat oven to 350 degrees F. Bake for 35-45 minutes or until the loaf sounds hollow when tapped on the bottom.
Remember to thoroughly mix the dry ingredients before adding to the liquids because they are powder-fine and could clump together.


Sunday, March 18, 2012
Monterey Jack and Cheddar Cheese Bread

1 egg
1/3 cup olive oil
2/3 cup milk
1 1/2 cup Tapioca flour
1/2 cup (packed) grated cheese (your preference)
1 tsp salt
Use a mini-muffin tin about half the size of a regular muffin tin.
*It helps when baking with eggs to start the eggs at room temperature. If you don't plan ahead you can put the egg in a bowl of warm water for a few minutes to gently take off the chill of the fridge.
Directions:
- Preheat oven to 400°F. Grease a mini-muffin tin. Put all of the ingredients into a blender and pulse until smooth. You may need to use a spatula to scrape down the sides of the blender so that everything gets blended well. At this point you can store the batter in the refrigerator for up to a week.
- Pour the batter into the muffin tins.
- Bake in the oven for 15-20 minutes, until all puffy and just lightly browned. Remove from oven and let cool on a rack for a few minutes.
Enough batter for 16 mini muffin sized cheese breads.
They are so good!! And they turned out great when I made them :)


Saturday, March 17, 2012
Chocolate Delights
These are super delicious!! Enjoy!!! :D
 Ingredients:
2 cups sugar
5 Tbsp gluten free cocoa
1/2 cup margarine
1/2 cup milk
1 tsp vanilla
3 cups gluten free oats
1 cup coconut
Directions:
In a large saucepan, bring sugar, cocoa, margarine, and milk to a boil (stir until boiling) on medium high heat. Then let it boil for 2 minutes (don't stir).
Remove from heat and add vanilla. Pour oats and coconut into the pan and mix. Drop onto wax paper and refrigerate until hardened (30min-1 hour). Then transfer into a container and you can eat them!! :)


Monday, March 12, 2012
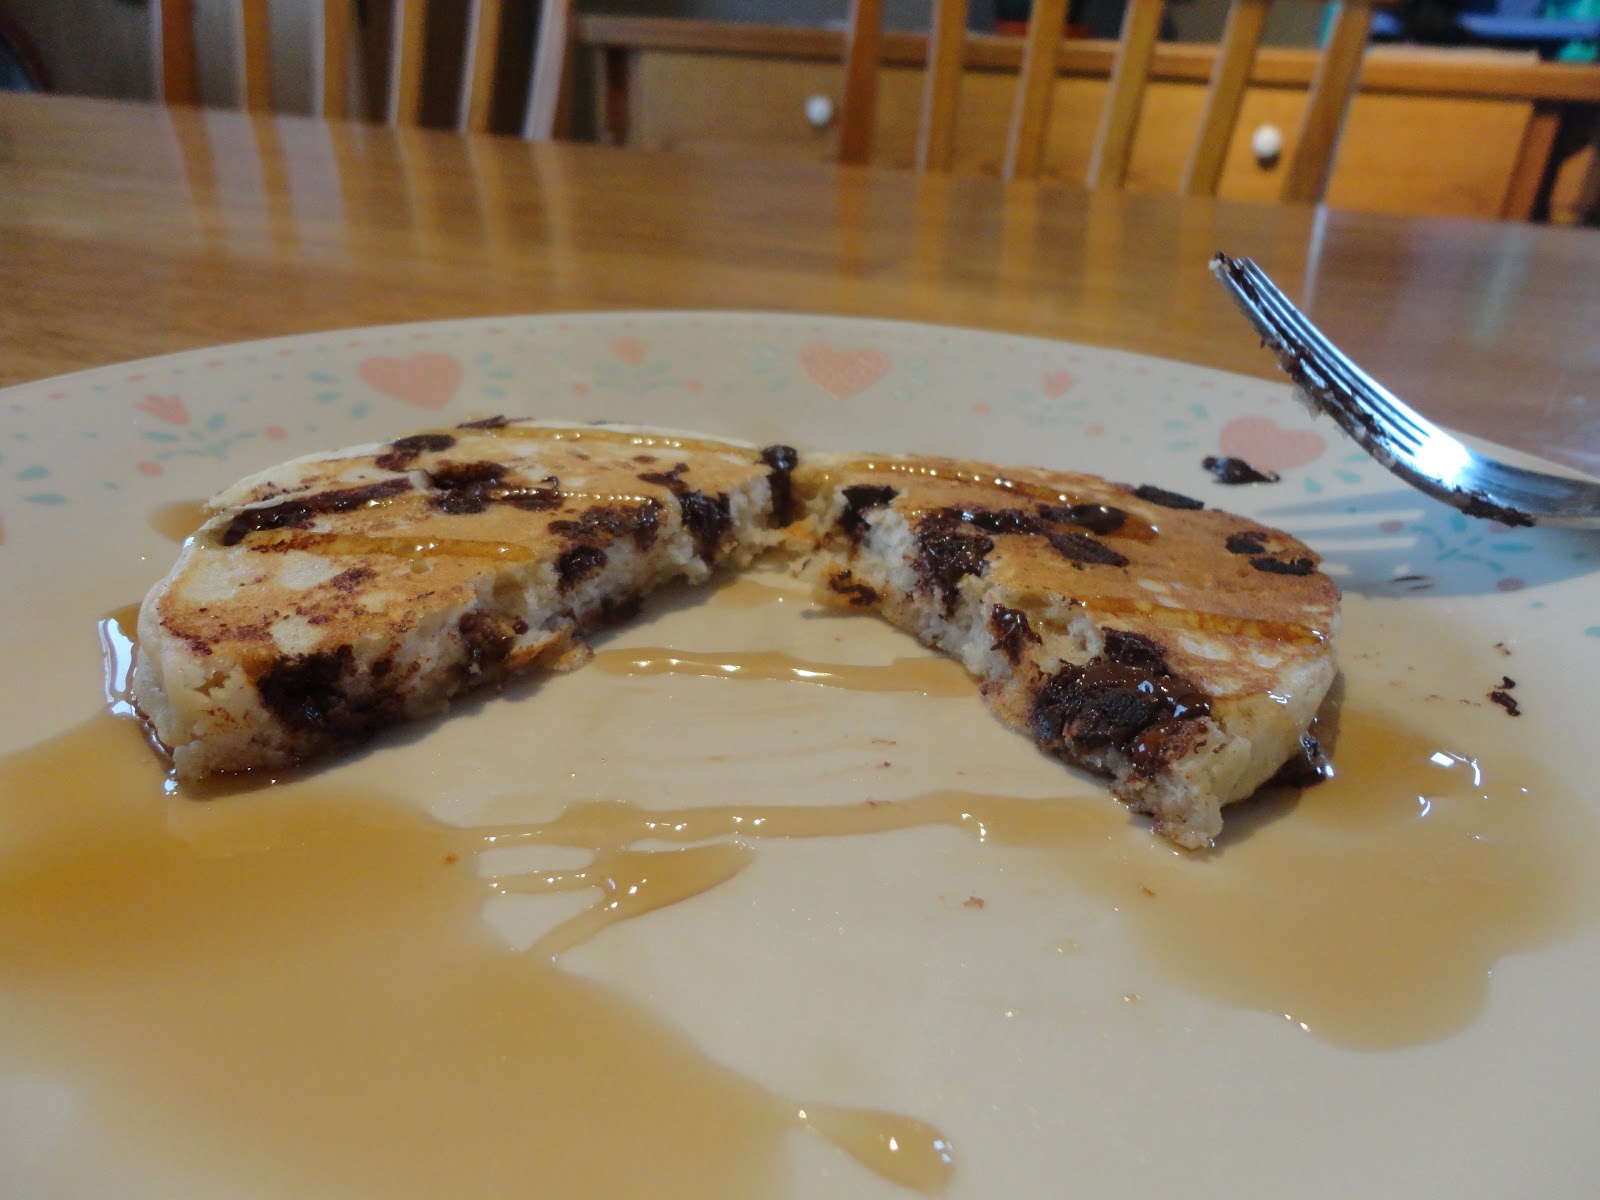
Homemade Pancakes


4 tablespoons (1/2 stick) salted butter
1 cup sweet sorghum flour
1/2 cup sweet rice flour
1/4 cup tapioca starch
2 tablespoons sugar
2 1/2 teaspoons baking powder
1 teaspoon xanthan gum (or 1 teaspoon guar gum)
1/4 teaspoon salt
1 1/2 cups milk
2 eggs
1/2 teaspoon vanilla extract
Directions:
- Melt the butter. Put aside to cool slightly
- In a large bowl, combine the sorghum flour, white rice flour. and tapioca starch, sugar, baking powder, xanthan gum, and salt. Whisk until well blended.
- Combine the milk, eggs. and vanilla in a small bowl. and stir with a fork until well blended. Pour the milk mixture and the melted butter into the flour mixture. Whisk until the flour mixture is well combined and a loose batter forms.
- Heat a frying pan over medium heat until hot. Grease the pan. Drop the batter by however big you want your pancakes to be and cook until a few holes form on top of each pancake and the underside is golden brown, about 2 minutes. Flip them over. Cook until the bottom is golden brown and the top is puffed, 1 to 2 minutes more.
- Then you can eat!


I added chocolate chips to the last pancake I made just for fun! Really good!!! :)
Wednesday, March 7, 2012
Chewy M&M Oatmeal Peanut Butter Cookies

Ingredients:
One egg
1/2 cup packed brown sugar
1/2 cup white sugar
1/2 cup butter
3/4 cup peanut butter
1 tsp baking soda
1 tsp vanilla
2 cups oat flakes (Trader Joes Gluten free Oats)
M&M's (however much you want)
Put all ingredients into the bowl of a heavy-duty mixer and beat until well mixed.
Drop by teaspoon onto cookie sheet and bake at 350 degrees F for 12-15 minutes. Let sit for a couple of minutes before removing from pan.
And then you eat them!! :D


Scalloped Potatoes

6 Russet potatoes, peeled, sliced 1/8-inch thick
1/2 cup onion
1/4 cup Margarine
1/4 cup All Purpose Baking Flour Bob's Red Mill (Gluten Free)
2 cups milk
Pepper
Paprika
Monterey Jack and Chedder Cheese
Farmer Sausage
Green Beans
Directions:
Make your classic white sauce (a Rue) - Melt Margarine in pan on medium heat. Once melted add the flour and whisk for about a minute. Then add the milk and whisk. Keep whisking until thickened. Then add the pepper. (You can add salt but I didn't because there is salt in the cheese.)
Layer the potatoes in a 9x13 dish. The first layer of potatoes then add some of the diced onions, then potatoes, then the rest of the diced onions. Then pour the Rue over top of the potatoes and sprinkle Paprika on top. Add the cheese. And bake in oven at 375 degrees F for 1 hour.

Monday, February 27, 2012
Cream of Chicken Soup
Ingredients:6 cups of Chicken broth
6 chicken drumsticks (this was used for making the chicken broth)
3 cups of milk
6 Tbsp of cornstarch
1/4 of a medium onions (diced)
Salt
Pepper
Cayenne pepper
Directions:
Make your own chicken broth however you like it.
In pan pour 6 cups of chicken broth, diced onions, chopped up chicken from chicken broth. Let it come to a boil and cook until onions are soft. Then add 2 of the cups of milk to the pan. Mix the cornstarch with the remaining milk in a separate bowl, then add it to the pan. Stir constantly on medium heat. Then add all the spices. And continue to stir until it is boiled and thickened. (It tastes better the next day and it is a bit thicker as well.)
I don't have any pictures of the soup because when I ate it I completely forgot to take pics and then the next day my camera was dead so whenever I make it again I will definetly post some pics!
Okay so a month later I finally have a pic of the soup! Its super good. :D

Thursday, February 23, 2012
Gluten Free White Bread


Okay so I was so excited when I heard that you can buy a bread machine that has a Gluten Free cycle on it, and well I just had to have it! So i bought a Black&Decker Bread Machine. I'm really excited about how my very first loaf of bread turned out and how it tasted! Delicious! :) (By the way I got this recipe right out of the book that the bread machine came with.)


Gluten Free Bread, 3-lb. loaf.
2 1/4 cups water (80-90 degrees F)4 large eggs, at room temperature
1/3 cup canola oil
1 1/2 tsp vinegar or cider vinegar
3 cups white rice flour
1 cup dry skim milk powder
2 tsp. salt
3/4 cup potato starch
3/4 cup tapioca flour
1/2 cup cornstarch
4 1/2 tbsp. sugar
1 1/2 tbsp. xanthan gum
3 1/4 tsp. bread machine yeast
1. Measure ingredients into baking pan in the order listed, making sure yeast does not touch the liquid.
2. Insert bread pan securely into unit; close lid. Plug into electrical outlet.
3. Select Gluten Free setting (#6 on the Black&Decker), appropriate loaf size (3-lb.) and desired crust color (I did medium)
4. Push Start/Stop (1/0) button.
5. The complete signal will sound when bread is done.
6. Using pot holders, remove bread pan from the unit and carefully remove bread from pan. (Kneading paddles may remain in bread. Remove paddles when bread has cooled.)
7. Allow bread to cool on wire rack until ready to serve (at least 20 minutes).


This bread actually tastes like real bread! It's been a while since I have had bread with wheat in it but I can tell you that it does because my mom says so haha:) Anyways I want to show you a comparison as to what I used to eat, it's quite hilarious!


This is just the package just wait till you see the bread size in comparison to the bread that I made!

So obviously the one in the middle is the bread from the store. I'm not gonna lie it does taste really good. But it only tastes good toasted and with nutella on it because it is a sweet bread. So I am excited to eat my home made bread with ham and cheese! I haven't had a ham and cheese sandwich for a very long time and I can't wait! :) I hope you have fun making it and eating it as much as I did and will!! :)
Subscribe to:
Posts (Atom)